
Suggestions for photographing wildlife from a kayak
I love photographing birds and other wildlife from my kayak. It often provides a different perspective on the subject while also opening up the water as a location for photography.
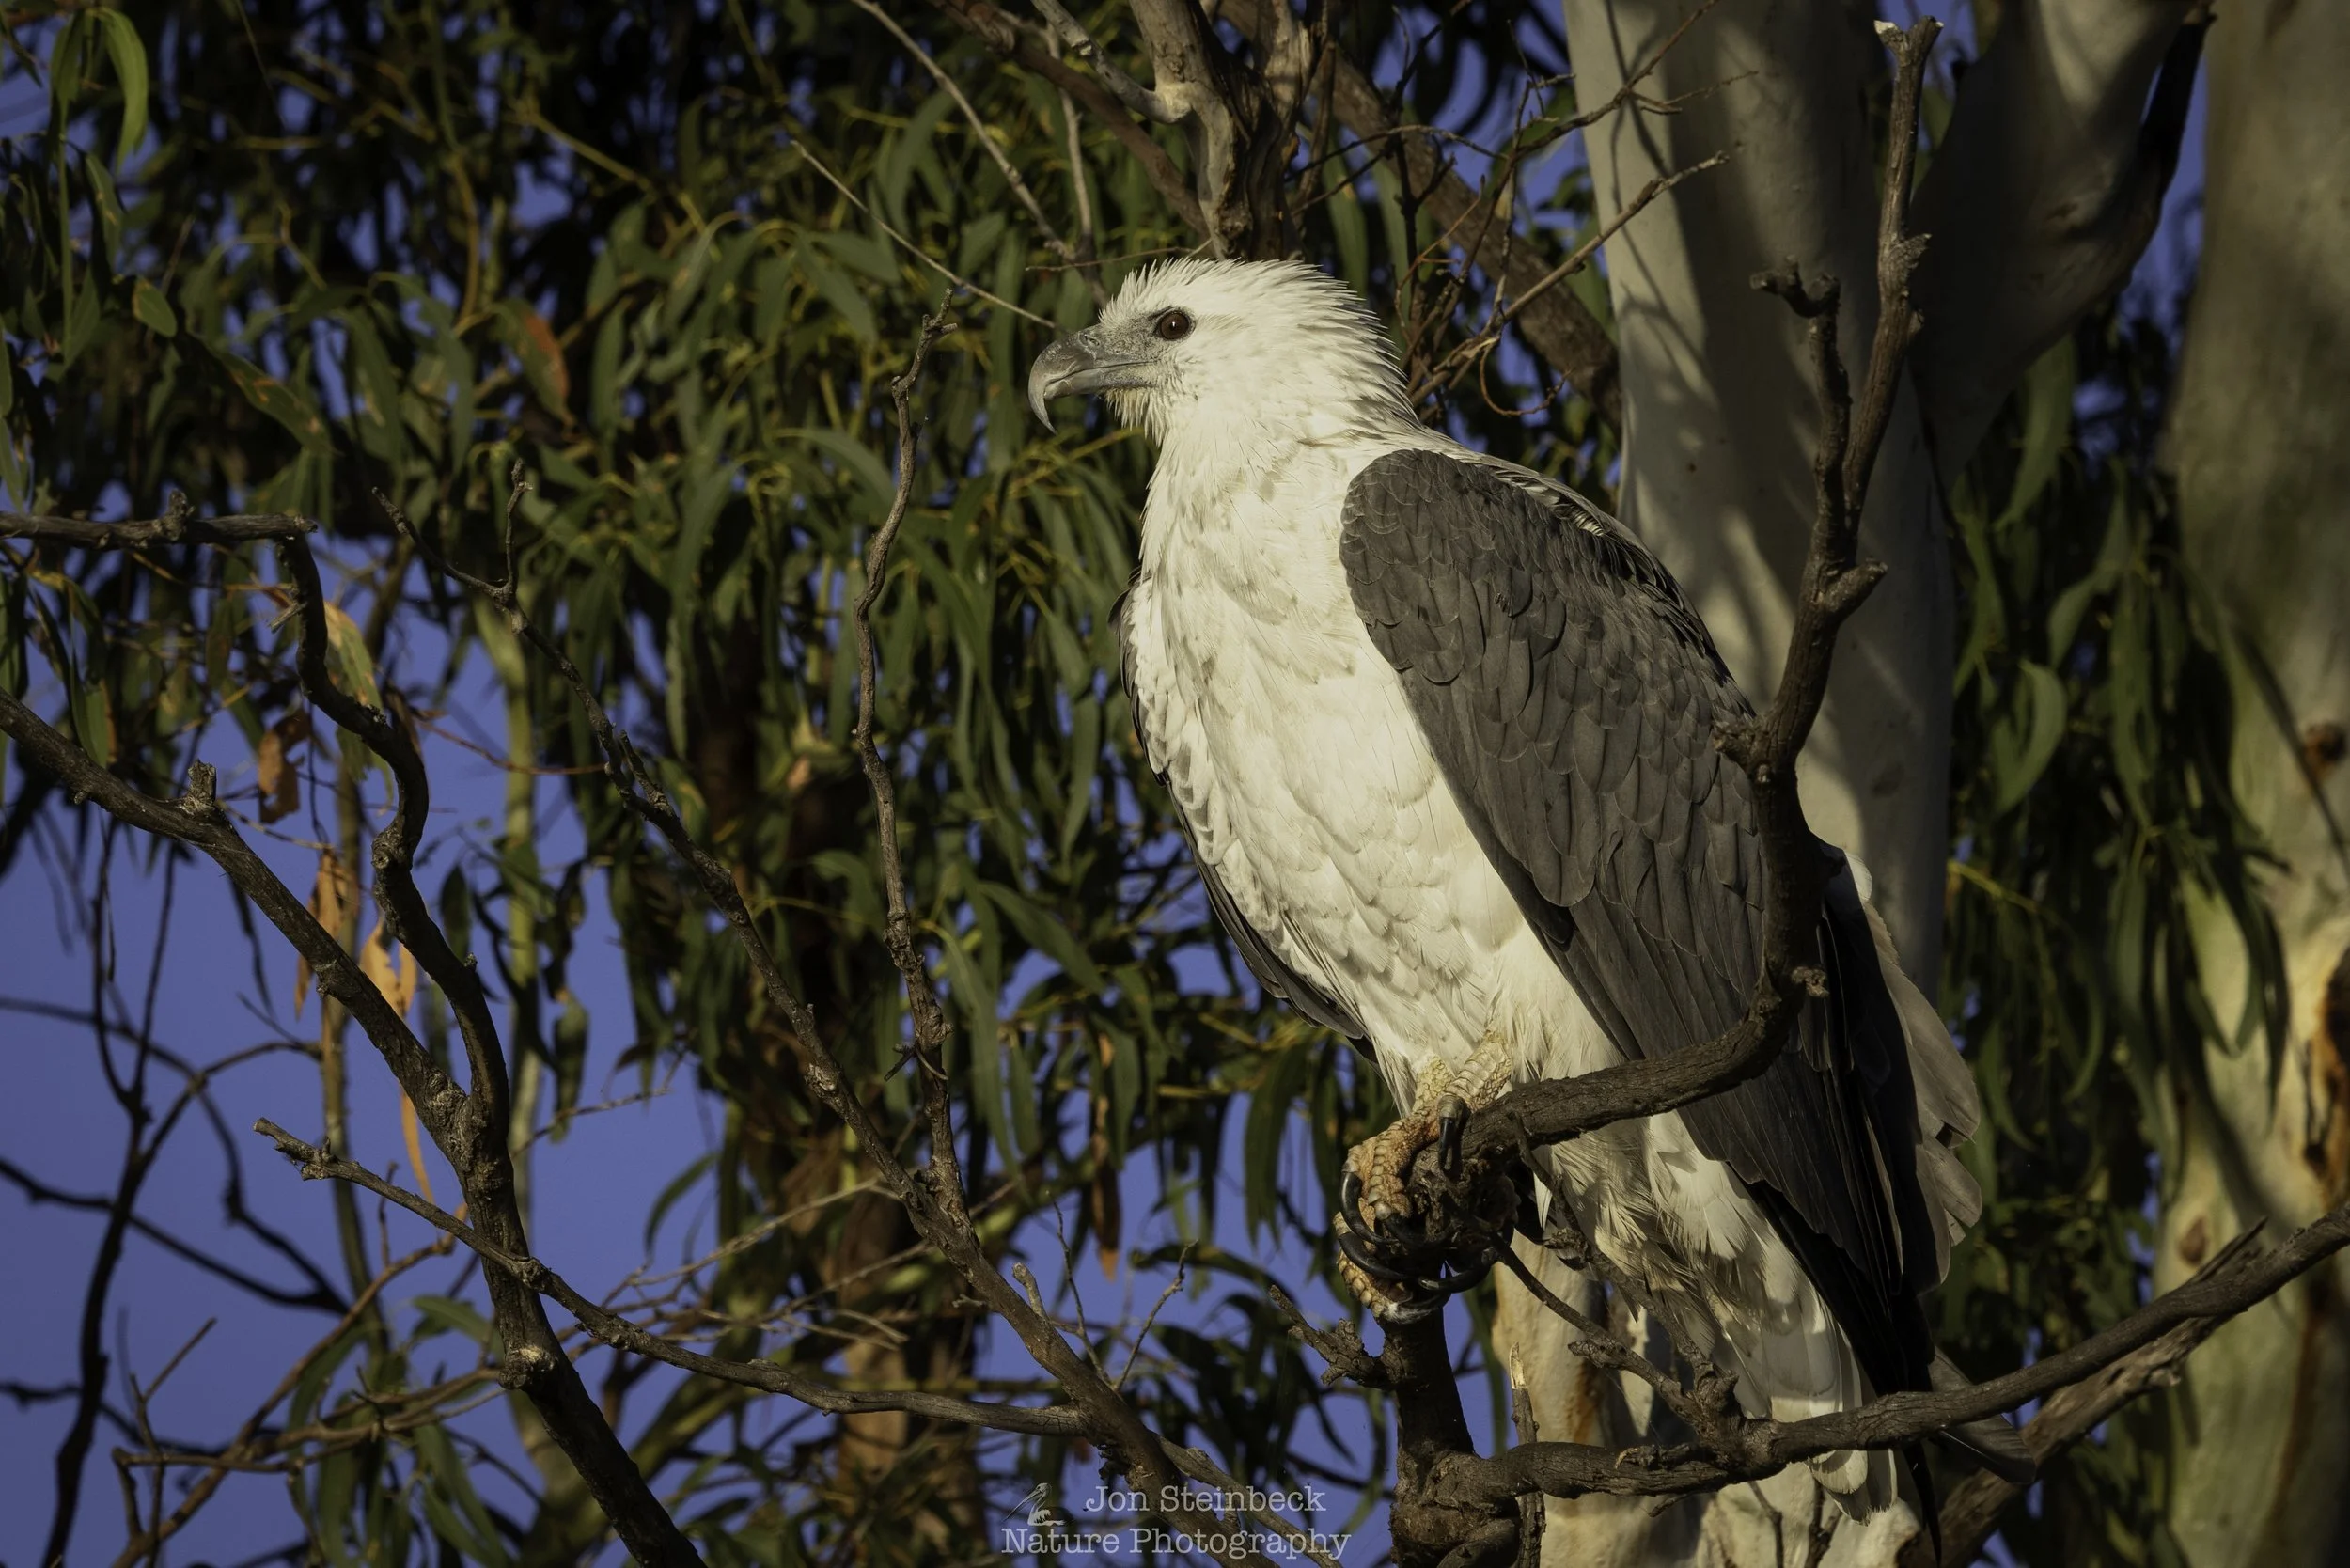
Photographing wildlife from a kayak opens a whole new perspective on photography. I also find it very soothing to simply be watching birds and animals while I am floating quietly on the water. The suggestions below will hopefully help you not just enjoy the experience but also take some of your favourite photos. (All the wildlife photographs on this page were taken from my kayak.)
Which kayak
I have owned a couple of kayaks that I have used for photography. Your kayak choice depends on how you want to use it for photographing.
Sit-on-top-kayaks - There are a number of these kayaks and they are not always expensive. This style also covers the fishing kayak that was designed for anglers to fish from while also carrying their catch and other equipment. It is pretty easy to see how these kayaks could easily be repurposed for photography. I haven’t used one myself but I have seen other people use them for photography and they make really stable platforms for taking photographs. However, that stability means that they aren’t the best kayak for covering a long distance or for handing choppy waters. Of course, that may not be an issue. If all you want is to put a kayak in still water and not travel far, think photographing at a wetland, then this is a good option. Some of these kayaks are operated with pedals so you can carry your camera while still moving forward.
Recreational kayaks - These are probably the next step up from sit-on-top kayaks, because these tend to be sit inside kayaks. These can still have large cockpits for entering the kayak and also tend to be wide and flat to assist with stability. They are not made for going far but rather for enjoying a paddle. I have had one of these and really enjoyed it. They kayak a Wilderness Systems Pungo was very stable and I even trialed setting a tripod in the large cockpit as a way to get more stability. Spoiler alert, I didn’t persist with it.
Touring and sea kayaks - These are the upper end of kayaks, with a cost to match. My current kayak, a Riot Brittany 16.5 is one of these and I love it. It is pictured on the left at the top of the section. I find that the kayak is stable enough for photography and it also allows me to go exploring. That can be really beneficial because it opens up options for easily carrying a lot of camera gear to places that don’t have vehicle access. These types of kayaks are also great for kayak camping. These kayaks are not an option that will suit everybody but this style will provide some great opportunities for wildlife photography and for getting out into nature.
Other equipment
I won’t discuss kayak specific equipment such as paddles or personal flotation devices (PFD) - although you should wear one. There are kayaking guides written by more knowledgeable people than me to provide that information. This section is about equipment for photographing from a kayak.
Beyond the kayak and camera, the most important question is how to store your camera while paddling. I think the best option is to start with a dry bag. A proper dry bag that can keep the water out. You can purchase these at most outdoor shops and Sea-to-Summit make a good range. I also have a Sea-to-Summit deck bag that I strap to the front of my kayak that then has the dry bag in it - although, I think that Sea-to-Summit have changed the design of the deck bag now. The dry bag should be attached to the kayak so that it doesn’t fall overboard - and your camera should definitely still have its strap on so that it doesn’t fall overboard either when it is out of the dry bag. If you have an expensive camera then buy a quality dry bag to protect that camera. You also want a dry bag that is long enough for the lens you are using. I find that the Sea-to-Summit set-up that I use easily fits my Canon EOS R5 Mk II with a Canon RF 100-500mm f/4.5-7.1 L IS USM Zoom.
The downside of a dry bag is that it can be slow to remove a camera to take a picture but I would rather risk missing a shot than to have water ruin my camera and lens.
You should also pack some cleaning gear in a small dry bag but be careful when cleaning the lens glass. If there is salt on the lens be cautious about wiping it because that could remove the lens coating. You may want to try using the blower and brush to remove the salt first.
Before removing the camera from the dry bag try to dry your hands. This could be done by shaking them, if that won’t disturb the wildlife too much. Most good, modern cameras do afford some protection against wet hands and slight dampness, but be aware of how wet your hands are before handling your expensive camera. You could also consider have a small hand towel inside the dry bag to quickly wipe your hands. You might also think about adding some silicone bags to the dry bag to help keep the moisture down. When I get home after using my camera on the kayak, I normally wipe the body and the outside of the lens with a slightly damp cloth to remove any salt. You could also use a small brush to clean around buttons and wheels, but don’t use a soft brush you may clean your lens with, you don’t want cross-contamination of the salt from the body to the lens.
If you will be kayaking for a while, think about having another dry bag to hold spare batteries and memory cards, etc. Again, spend the money to keep your equipment, and, precious photographs, safe.
I have seem some people fit a tripod to their kayak and carry their camera there. That is an option if you are only staying on still water. One downside is that it can restrict moving the camera around to shoot something happening to the side. I have tried a tripod in the kayak once and found it cumbersome but I guess other people may have solutions. Give it a try and see how it goes.


Techniques
Photographing from a kayak means that you are sitting down so that you are already at a lower than normal perspective. Most of your shots will be across the water surface rendering that lovely softness to the water in the foreground of your pictures. These are the perspectives that become commonplace when photographing from a kayak and they are a really wonderful way to photograph wildlife.
To start with, when you are getting used to taking photographs from your kayak, I would recommend trying to keep your bow pointed towards the subject. This is especially helpful if you have a long lens for wildlife. Your kayak will be more stable when you lift your camera. So try to approach your subject with the bow pointing towards it and cease paddling when you judge that you can drift towards it. Put your paddle across your front tucked under your PFD in case you need to grab it quickly. Just lean back slightly, place your paddle across your front and then sit back normally to have your PFD effectively hold your paddle in place.
As you consider when to start drifting you will need to judge the wind, tide and waves. These will all cause your kayak to move. You will probably misjudge those variables initially but it will get better with practice. Sometimes drifting up on wildlife is a real help because the wildlife may be less spooked by your approach. As on land, try to avoid heading straight towards them, predators do that. Try to judge the wind, current and waves and let them carry you to a good spot to take the photograph. If you think that you will overshoot, slowly place your paddle in the water to slow you. A rapid stop with a strong paddle stroke will scare the wildlife. I have found erring on the side of falling short is best. I have developed a way to use my paddle with one hand, while my other hand holds the camera. I wouldn’t want to paddle far like that but it can be enough to keep my kayak moving forward but you will need a strong wrist to make it work.
Just as with photographing on the land, you also need to be conscious of the direction of the light so that you can hopefully drift to the best spot to take the photograph that you are envisaging.
Be slow and deliberate in your movements. Fast movements may spook the wildlife. Before you remove your camera from the dry bag check your surroundings to ensure there is no boat fast approaching or some other cause of waves. Sudden boat wash or waves will make it harder to take a photograph and may put you in the water.
Once your camera is out, keep it up to your face. Sometimes having a camera up hiding your face will make wildlife, birds in particular, less worried possibly because they can’t see your eyes. I don’t guarantee all animals will stay still but having a camera to my face while I slowly drift towards my subject has allowed me to get very close to some birds. Also, take shots while you are drifting towards the subject, don’t just rely on getting the perfect shot once you get where you want to be. It is much harder to get a kayak in the perfect spot so take some shots on the approach so that you at least have images that you can crop later.
Keep your elbows tucked in. This will make your camera more stable and it can help your kayak stay stable. I have trialed leaning forward to stabilise myself on the deck but I have not been happy with the results so I would recommend to stay sitting upright.
You will probably need to use a faster shutter speed than normal. If you are using a long lens then make sure that you follow the old guideline of not using a shutter speed lower than the focal length. You may want to add 100 to your shutter speed just to be on the safe side. Choosing multiple exposures may also help you to get a photograph from a kayak that is usable. You can ground your kayak near the subject if you want extra stability, but if there are small waves, you will find that your kayak still rocks. Think about exiting your kayak as well. If you think that won’t scare away the wildlife. Your kayak is a great means of transport for getting you to areas that are not possible, or harder, via land.
Once you have taken your photographs place the camera back in the dry bag, unless you see another shot just in front of you. However, if you are going to paddle any distance, place your camera back in the dry bag. It is better to be safe than sorry.
A kayak doesn’t move fast so you will be surprised about how much you see. That is part of the joy and it also allows you to notice more while you are on the water. Take the opportunity to paddle through the mangroves at high tide or any other vegetation that you can navigate through. Who knows what you may see.
