Tips on wildlife photography
Introduction
I am not an award winning photographer and so these tips are more a way for me to gather my own ideas about wildlife photography. I hope that readers also find these notes useful for their own photography.
Up front, I think the main tip is to get out and do photography, not necessarily take photographs but do photography. There is a difference. Photography is about choosing what goes into the composition and when to press the shutter release - and a photograph or image is the result. Taking lots of photographs is not the same as doing photography. Rather than pointing and shooting, spraying and praying, or taking shots; it is better to slow down, think about composition, what is the intent of the image, what is the background, etc. That is doing photography. So perhaps a good mantra to adopt is - take less photographs, do more photography.
However, with the above said, the goal is to get outside and do wildlife photography for two very important and related reasons. First, practice is the best way to improve a skill. The famous French photographer Henri Cartier-Bresson, is quoted as saying that “your first 10 000 photographs are your worst.” Noting that quote was in the days of film cameras, not now with high speed drives taking tens of frames a second, so the point is that photographers will take a lot of photographs along their photographic journey of improvement.
The other reason for getting out and doing photography is summed up by something that British photographer Nick Turpin said in a video about Street Photography, “great shots happen when you are out taking good shots.” I am not saying that I have taken any great photos but I understand his point. Street photography and wildlife photography share some attributes. The photographer can envisage an image that they want to create. They can go to the best location at the right time and set up for the light direction that they want to use but they can’t control the subject nor the weather. So, being outside doing photography may open up the opportunity for that great shot.
Camera Selection
There is an adage that says “the best camera is the one that you have with you at the time you want to take the photograph.” If you see something amazing that you really want to photograph and you only have your phone with you, then that is the best camera for the job.
Point and shoot cameras
The next level up from a phone camera is the point and shoot camera. The sensor is normally larger than in a phone and the camera allows you to make more decisions about settings. It may also come with a zoom. Ideally, the zoom is an optical zoom, where there are lens elements that move so that the focal length is extended. Many point and shoot camera also have a digital zoom, which often is just a cropping of the image on the sensor, to give the effect of zooming. That means the image is smaller, although it also looks like the camera has ‘zoomed’ in on the subject. If you are using a point and shoot camera it will not know what you are actually trying to achieve with your photograph and so the shutter speed may not be fast enough to prevent the movement of the camera. If there is a ‘sports’ mode, it is best to use that for wildlife photography. If you can, especially if you are zooming in with an optical zoom, think about stabilising the way you are holding the camera.
DSLR and Mirrorless cameras
If you become interested in wildlife photography then a more advanced camera will help you take good photographs. At present, cameras are moving from the digital single-lens reflex (DSLR) to mirrorless. The major brands all have mirrorless cameras at different price points. A mirrorless camera is normally lighter and smaller than a similar DSLR because no mirror is used, rather the sensor and view finder are both digital, seeing the same image. They also have stabilization within the body and the view finder shows how the image will be rendered. More advanced cameras also allow for the fitting of different lens, meaning that a photographer can use lens suited for different types of photography. Potentially a 100-400 mm telephoto lens for wildlife and replace it with a 100 mm macro lens for insects. By using a more advanced camera, a photographer can shoot in manual mode to take full control of the shutter speed, aperture and ISO, and therefore become more creative. They can also shoot to the RAW format of image so that they can process the image later.
Approaching wildlife
So you have seen an animal that you want to photograph and now you need to get closer.
You are effectively stalking that animal. The bird or animal may notice you, they will not know that you just want to photograph them. In nature, the only creature that stalks an animal is something that wants to eat it. For birds and mammals, it is best not to look at them and to walk at a slow but steady pace in a non-direct approach. Try to look for a spot near them to photograph them from, and head there in a slow and steady pace, without looking directly at the animal, just out of the side of your eye. Move your camera slowly, and try to minimize your movements.
Reptiles, frogs and insects, often have less developed eyes so very slow movements can get you much closer to them. Especially if you get down low.
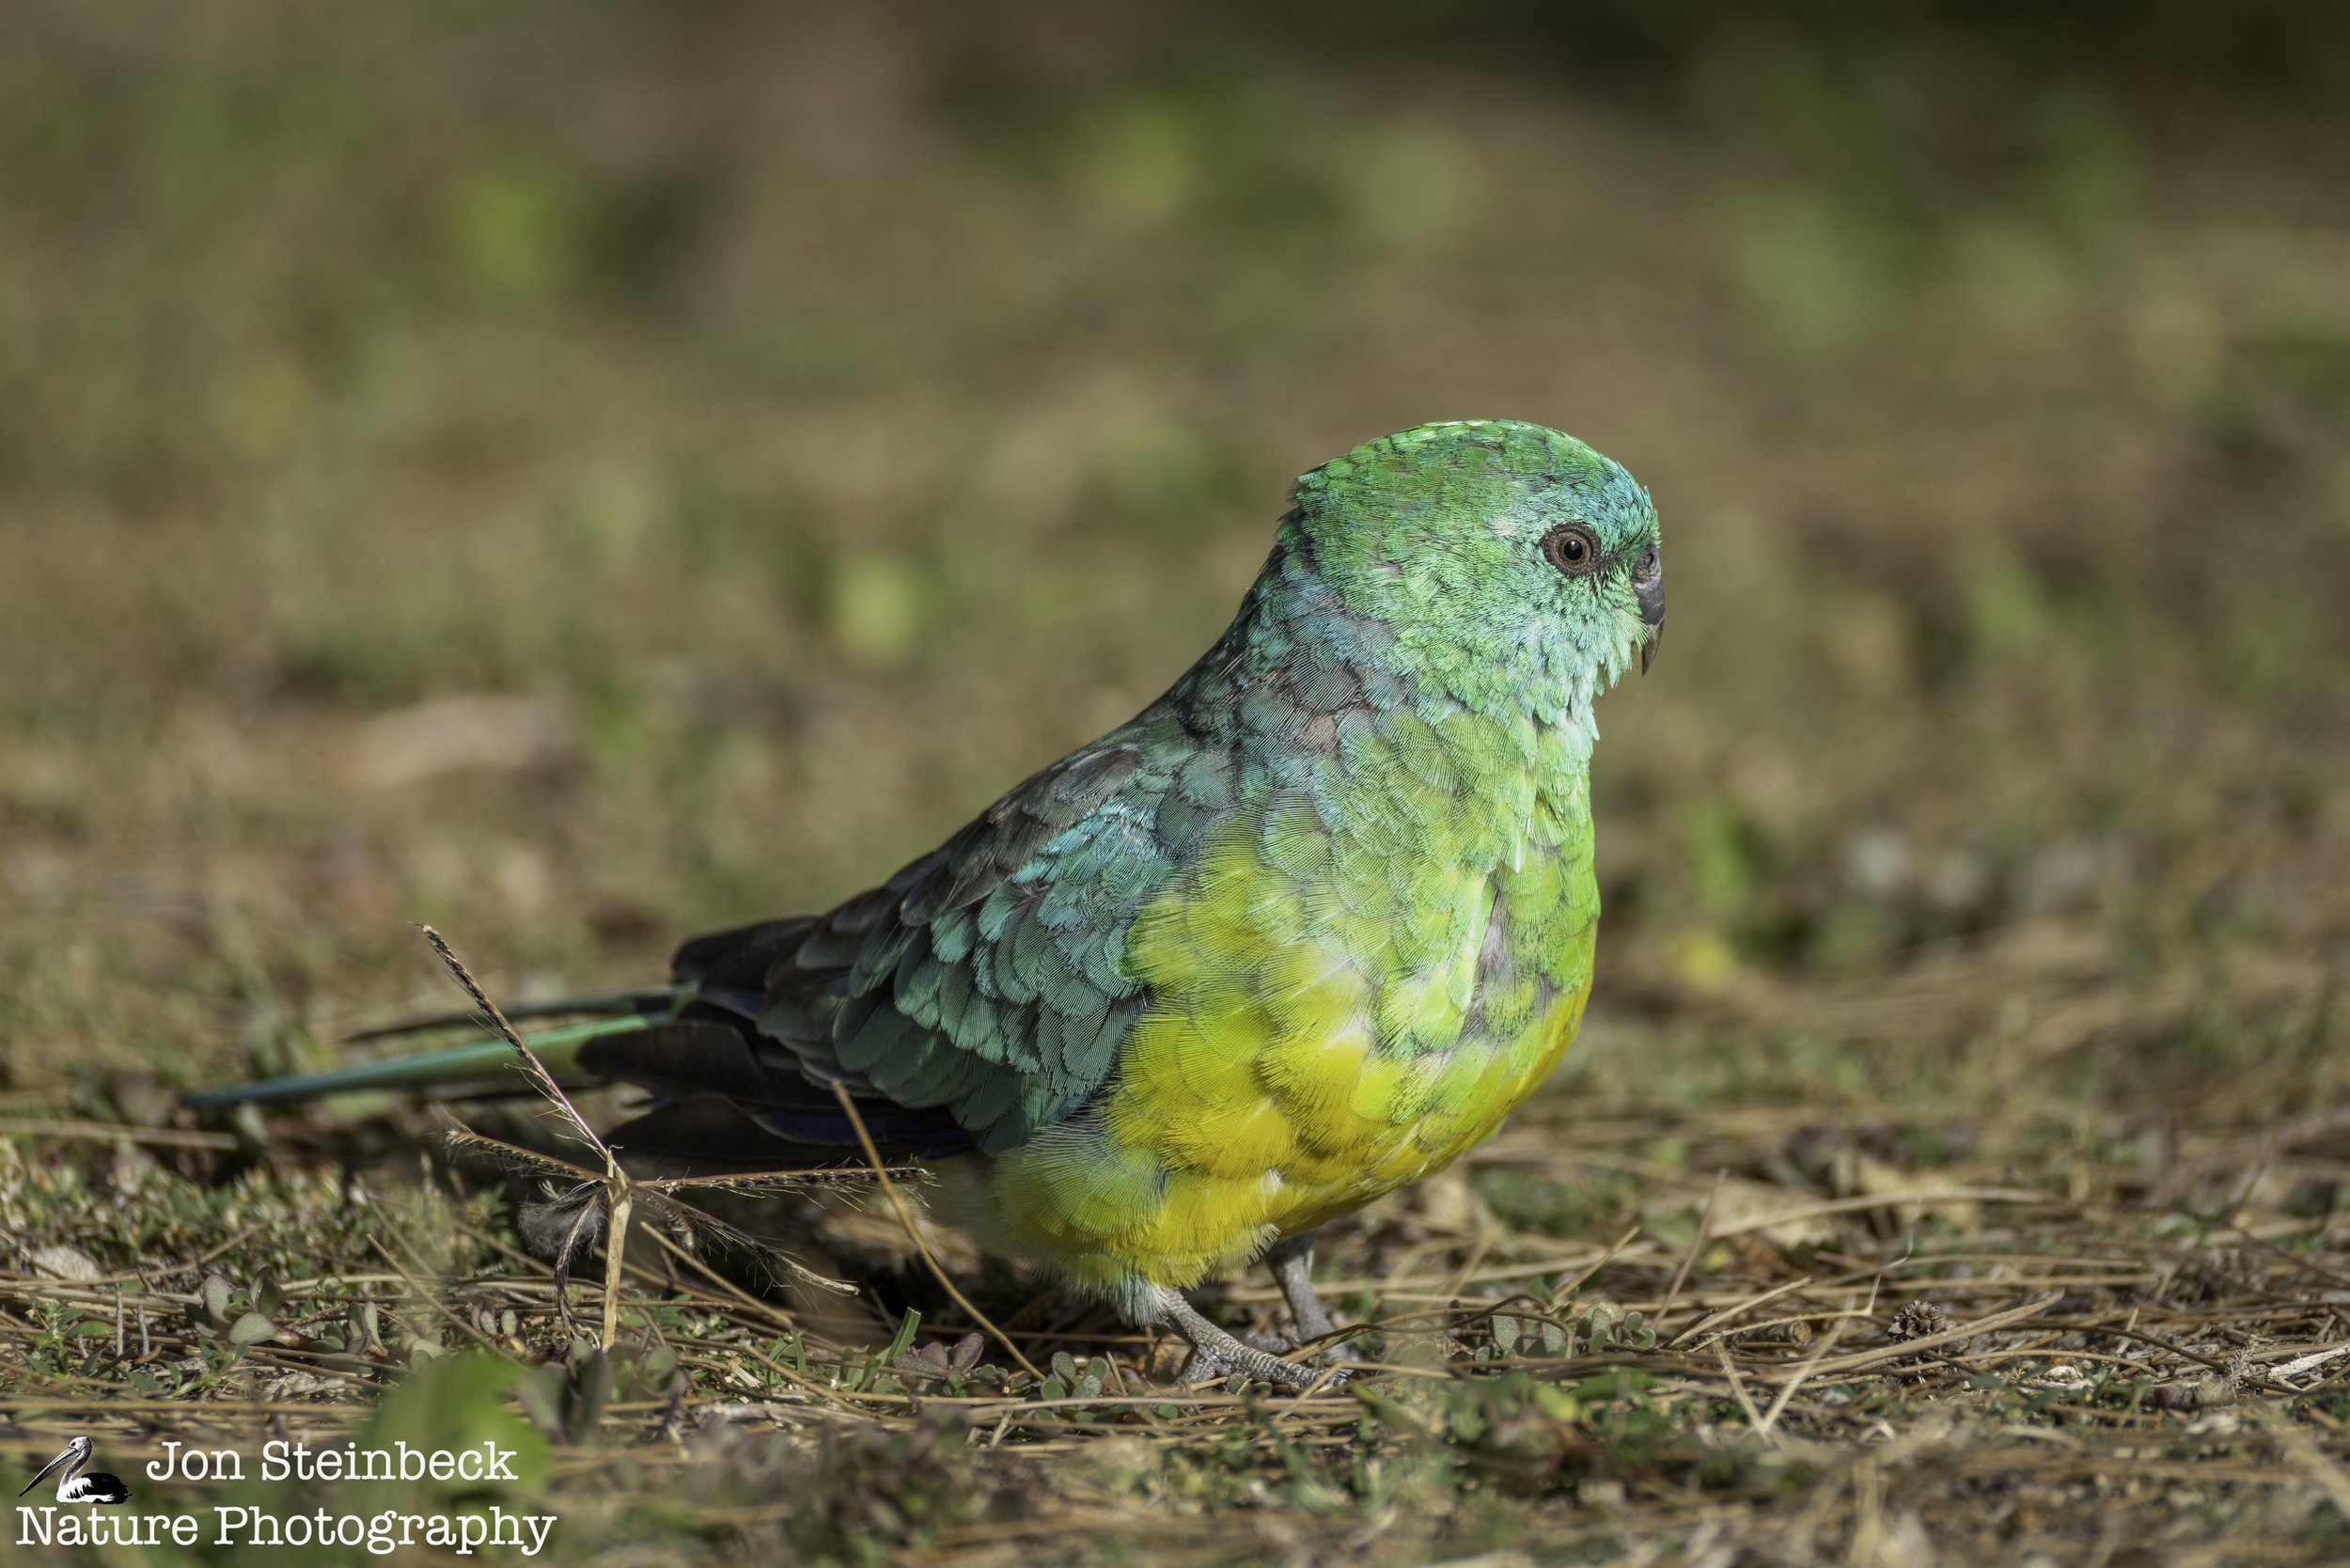
Photographing with the sun behind you puts an even light on your subject. It also means there will be less shadows on your subject. As you approach an animal, try to be mindful where the sun is and how it will light your subject. Photographers often refer to the golden hour, around dawn and dusk when the sun is low in the sky and it is like a studio light shining on the subject. The colour of the light can be slightly yellow, hence the term golden hour. Animals and birds are often active at this time so it is a good time to photograph them.
Another technique is to let the animals come to you. If you know where birds and animals go to drink – including bird baths or backyard ponds. Sitting quietly nearby may mean that you will not disturb the animals and they may not even notice you. Birds in particular will get used to a person sitting quietly who does not move much and will often go about their usual behavior without much care.
Taking a photograph
Now, you have the subject close enough for a photograph, so let’s take the shot.
This is obvious but still worth saying. When you hold the camera or camera phone to take a photograph, try to support it and hold it still. If you are holding a camera with a lens, most are set up for right-handed people, so use your right hand to hold the right-side with your index finger resting on the shutter button. Your left hand should be under your lens, supporting the weight of the lens.
You should consider ways to stabilize your camera, even if it is a phone camera. This could be by resting it on some solid object while you take a shot. You could try kneeling with one leg bent up so that your knee is sticking up and you can rest an elbow on that knee. You could also try lying down and supporting yourself that way. Try to avoid bending forward to support your weight on your elbows, this can lead to camera shake.
Try to squeeze the shutter release to minimize camera shake. For a camera, have your index finger resting on the shutter release and slowly squeezed it down. Often a half-press will focus the shot, then squeezing further will take the shot. You are trying to avoid jabbing your finger onto the shutter release, so think of a squeezing motion.
While good cameras have stabilization, you can help by thinking about when you take a photograph. If you have a long lens on, and are hand-holding the camera then think about your breathing, especially if you are using a long lens. Try to exhale your breath, pause, then gently squeeze the shutter button before you take a breath.
Take a safety shot – an image that may not necessarily be the best, but you have a photograph of the subject. Just in case by moving to get a better shot you scare it away. If your camera makes a noise, this is the time to pause to let the animal see that the noise doesn’t equal a threat. If you can mute the noise through camera settings that is helpful when photographing animals.
Often you see an animal, you get close enough to take a photograph, and you take the first photo that you can. Once you have that photo, or several just to make sure that you have a useable shot, think about other ways to photograph the subject. Especially if the subject is showing no signs of wanting to flee.
Different perspectives are the most obvious way. You have probably been walking and come across a subject, so your first series of shots are from your standing height. If the animal is lower down then try also going lower. This could be by kneeling or by lying down. Photographing an animal at its eye level normally makes for a better shot.

Here is another example of how taking a different perspective can also help change the look of an image. This example shows how shooting from the animal’s eye perspective across water creates a look that people normally don’t get because we are normally higher than the animal looking down on them. Both images of this group of Bar-tailed Godwits were shot with the same settings but for the one on left I was squatting down to take the photograph, while on the right I lowered the camera down to the bird’s eye level.
To take photographs like the one on the right, I flip out the back screen of my camera and make it horizontal so I can see it while looking down from above. I then lower the camera down until the back of my hand supporting the lens is touching the ground or sitting on the surface of the water. It takes a bit of getting used to moving the lens so that it lines up with what your eye is seeing through the back screen but the results are worth it. If you are using back button focus, that can also be a little tricky but nothing that can’t be overcome with practice.
Basic composition
The rule of thirds
In photographic composition, one of the first things that is taught is the rule of thirds. Normally, the next line is that the ‘rule’ is more of a guideline, and it is made to be broken. It is the general concept that a photograph that has the subject off to the left or right of the centre is more appealing. In nature photography, this can also be important because it givens the animal a place to ‘move’. A moving animal about to head into the edge of the photograph can look a bit strange. Even if the animal is just looking, and it is looking right at the side of the photograph it can seem a bit jarring. Putting space for an animal to move into or look at, normally creates a more pleasing photograph and an image that doesn’t seem to constrain the animal. The photograph on the left is an example of placing a bird with the rule of thirds.
That said, if the animal is looking straight at you, or moving towards you, then placing it more towards the centre looks better. Such as in the photo on the right.
However, all of this is a guideline, and have fun with it. Experiment and see what looks better. Digital photos give us a chance to experiment with.

Framing
Think about how you frame the subject. Although, you can crop an image in post-processing if needed, although you may need to have extra room around the subject depending on how you want to crop. Some shots you may want a tight frame, say for a head-on portrait of an animal. Although for most shots, the space around the subject helps it stand out and makes it a more interesting image.
Try to keep the background clear. This is often easier said than done. Keeping the background clear removes distractions for the viewer and makes the animal standout. Sometimes, the easiest way to make the background clear is to change angles for the shot. This could be by moving to either side, or by lowering your position.
In addition, think about what orientation you wish to use for the frame, portrait (vertical) or landscape (horizontal). To an extent, this can be altered in post-production when cropping but it helps to take the image in the right orientation. There is also nothing saying that you can’t take photographs in both orientations and decide later which shot works better.

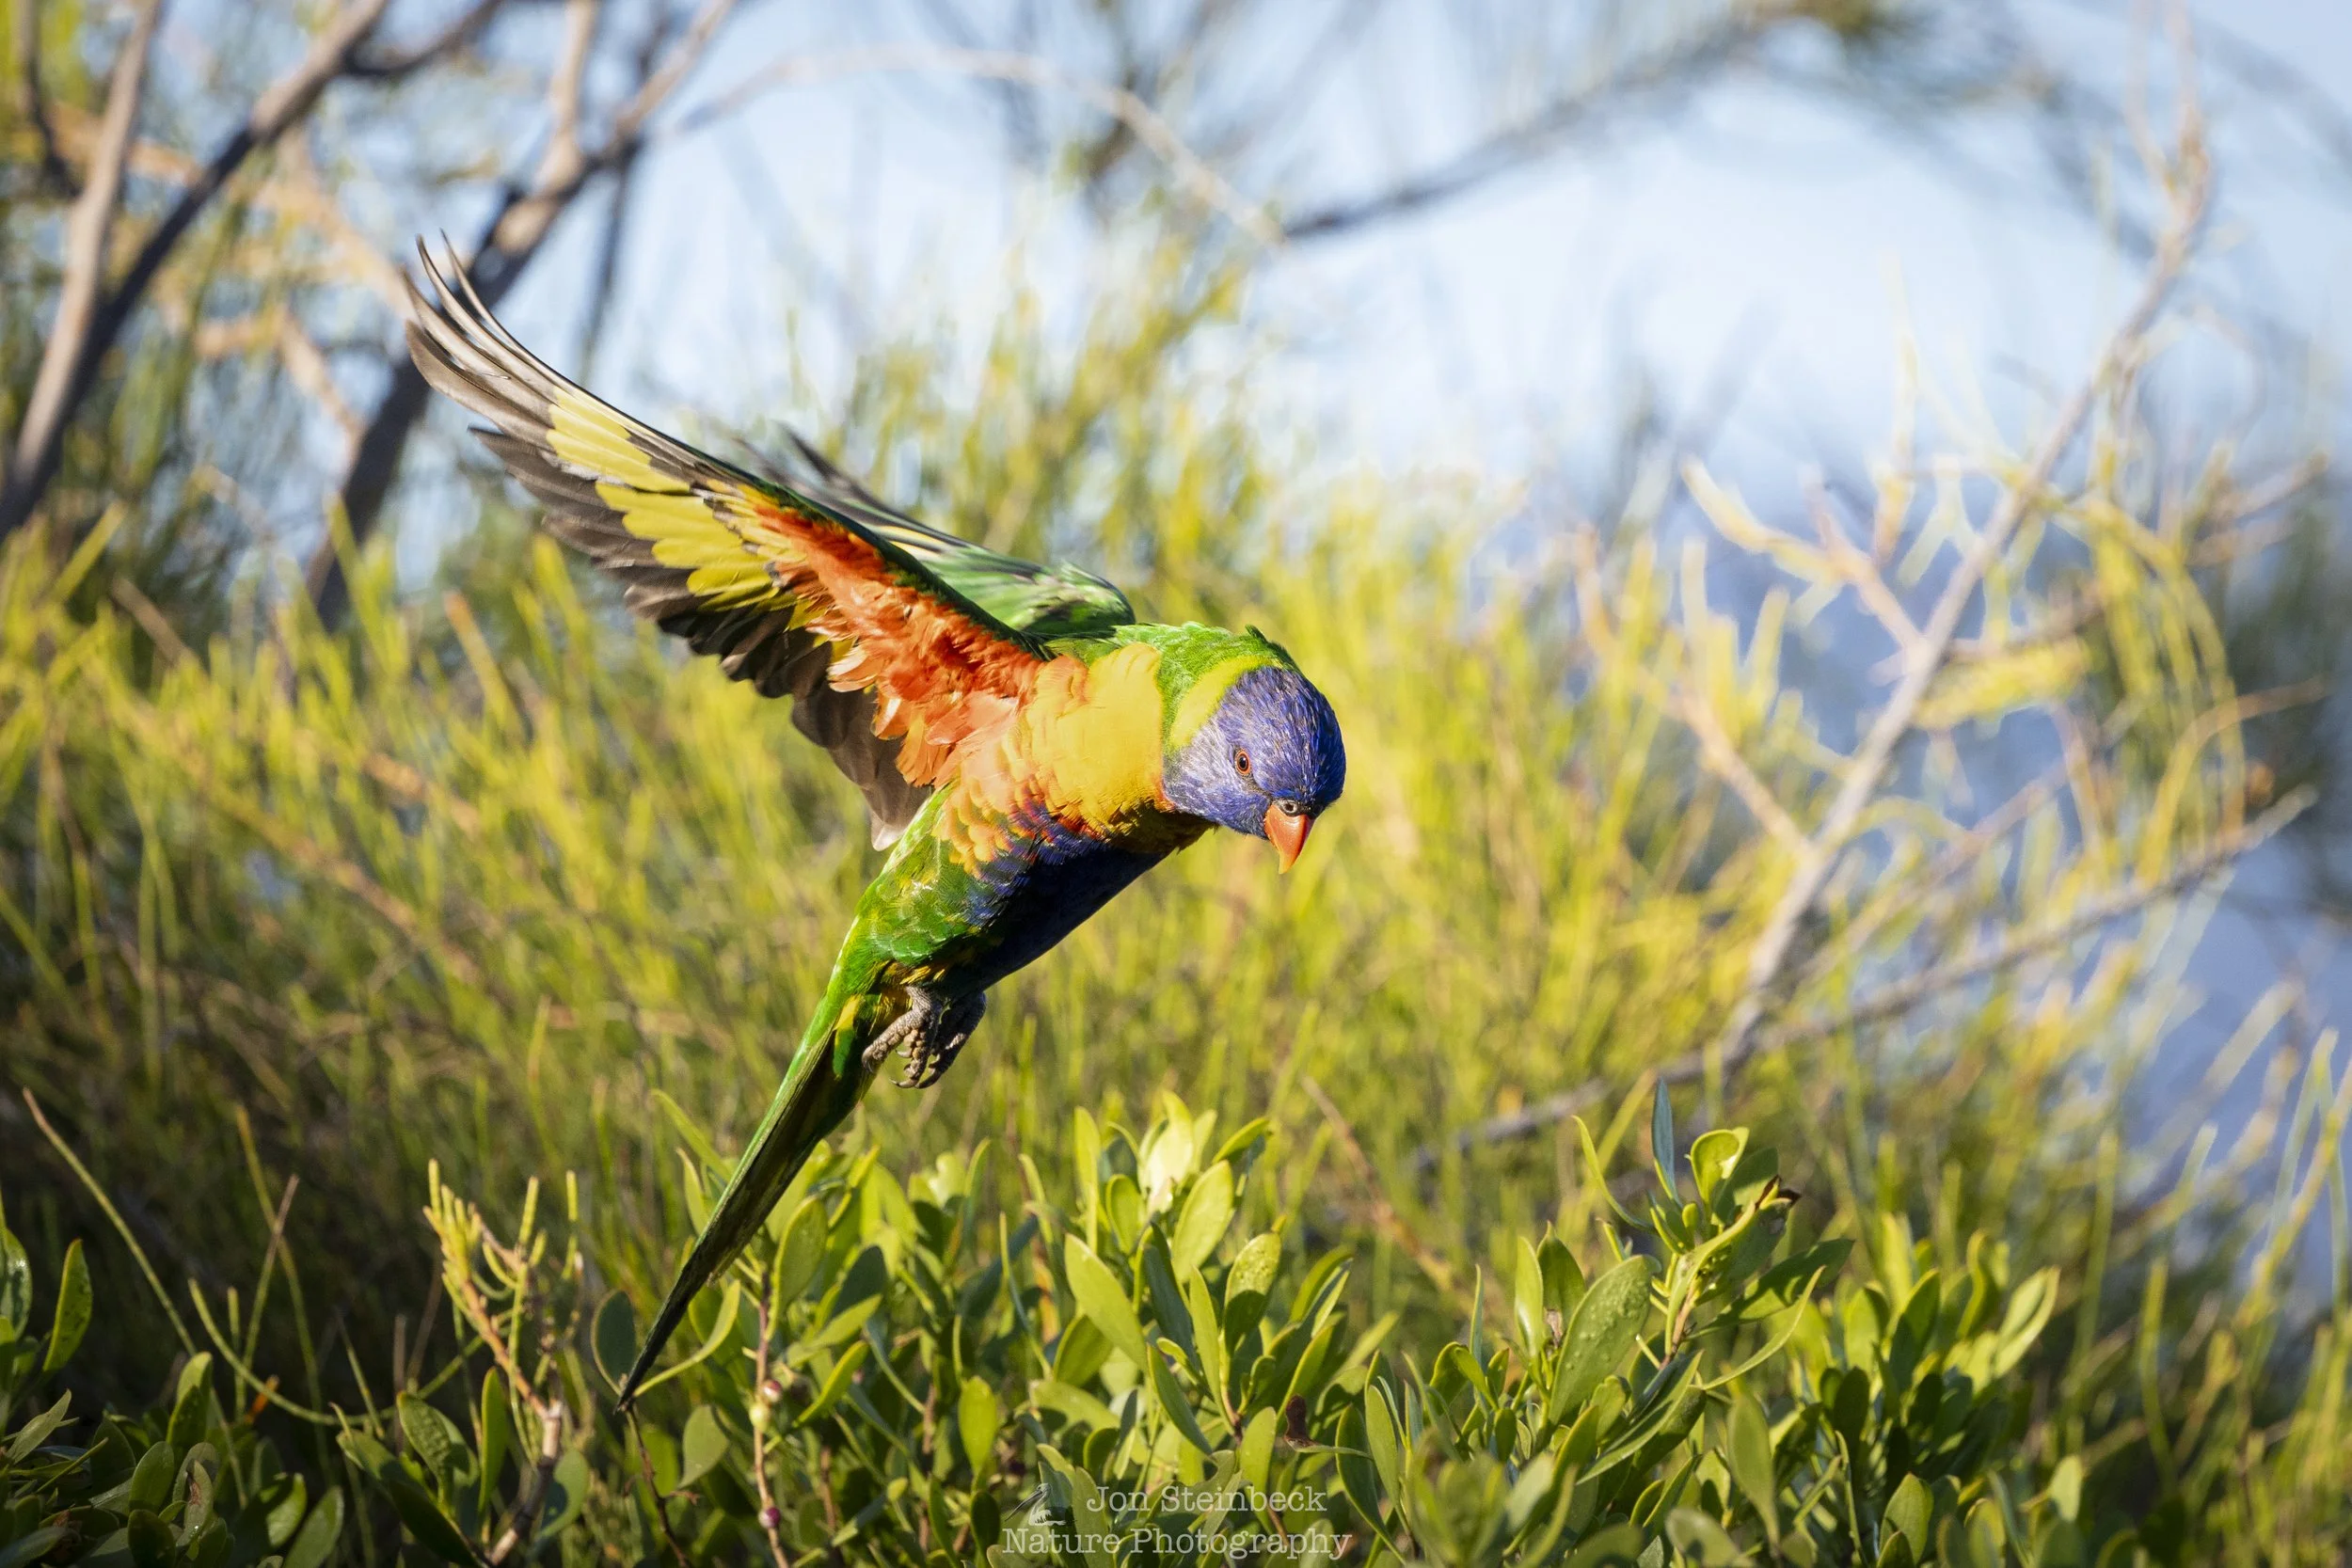
Photographing birds in flight
As part of the Certificate IV in Photography and Digital Imaging we had to conceive a photographic project and produce 15 images. I chose the beauty of birds in flight because I wanted to push myself to develop the skill of being able to photograph birds in flight. I think that I was overly optimistic in my project because it certainly challenged me. I was happy with the resulting images but I knew that it was the start of a journey, not the end. I love photographing birds in flight and I hope that I am getting better.
Here are some practical tips that I have learnt along the way.
Chose a good location - You would be surprised sometimes how rarely it seems that birds fly. They would rather walk, swim or hop branches rather than fly so chose a location where you know that birds will actually be flying. Tidal inlets are often a good choice because birds will move around to take advantage of different areas depending on the tide. Some birds may roost in the inlet but fish at sea so they are always moving backwards and forwards. Where ever it is, observe where the birds are flying and where you should locate yourself.
Lighting - As with all photography, lighting is very important. Starting out, I think having the light behind you and lighting your subject makes things easier.
Shutter speed - You will need a fast shutter speed to freeze motion, hence another reason to have good lighting on the subject. I would recommend starting at 1/2500 but consider going to 1/3200 or 1/4000 depending on the speed of the birds you are photographing. 1/2500 is a good speed for most birds but some of the faster flyers will need higher speeds. Aperture is your choice depending on what you are trying to achieve, although a good middle aperture like f/8 may be a good starting point. ISO will depend on your shutter speed, aperture and available light. To start with, there is nothing wrong with using auto ISO to reduce the number of variables.
Auto focus - On Canons, its is Flexible Zone AF. You can adjust them if you want, but keep it longer than it is taller because birds will mainly be flying horizontal. Most modern cameras have great auto focus and even eye tracking. In Canon, a blue rectangle shows what the camera is tracking, and often that becomes a small, blue square around the bird’s eye. That is normally what I look for before I release the shutter, with high speed continuous selected.
Lead or centre the bird - Try to keep the flying bird in the centre of the frame or at least lead it so that it will have ‘space’ in the final image to fly into. This is a skill and where it takes practice to get a bird nicely in the frame and then place it so that there is room around its wings and so its beak is not up against one of the sides of the image. It will probably take a little time to master placement in the frame, especially when the bird is close but the results will the reward.